Repair Log
Nobody really prepared you for just how much stuff on an RV will go wrong literally all the time! I wanted to start trying to document the issues I've run into here as well as
troubleshooting steps and how I repaired them!
Last Updated: 2024-04-06
Disclaimer:
I am no mechanic or repairman, just a normal everyday joe that is sort of handy and loves to learn.
March 2024
Suspension Update
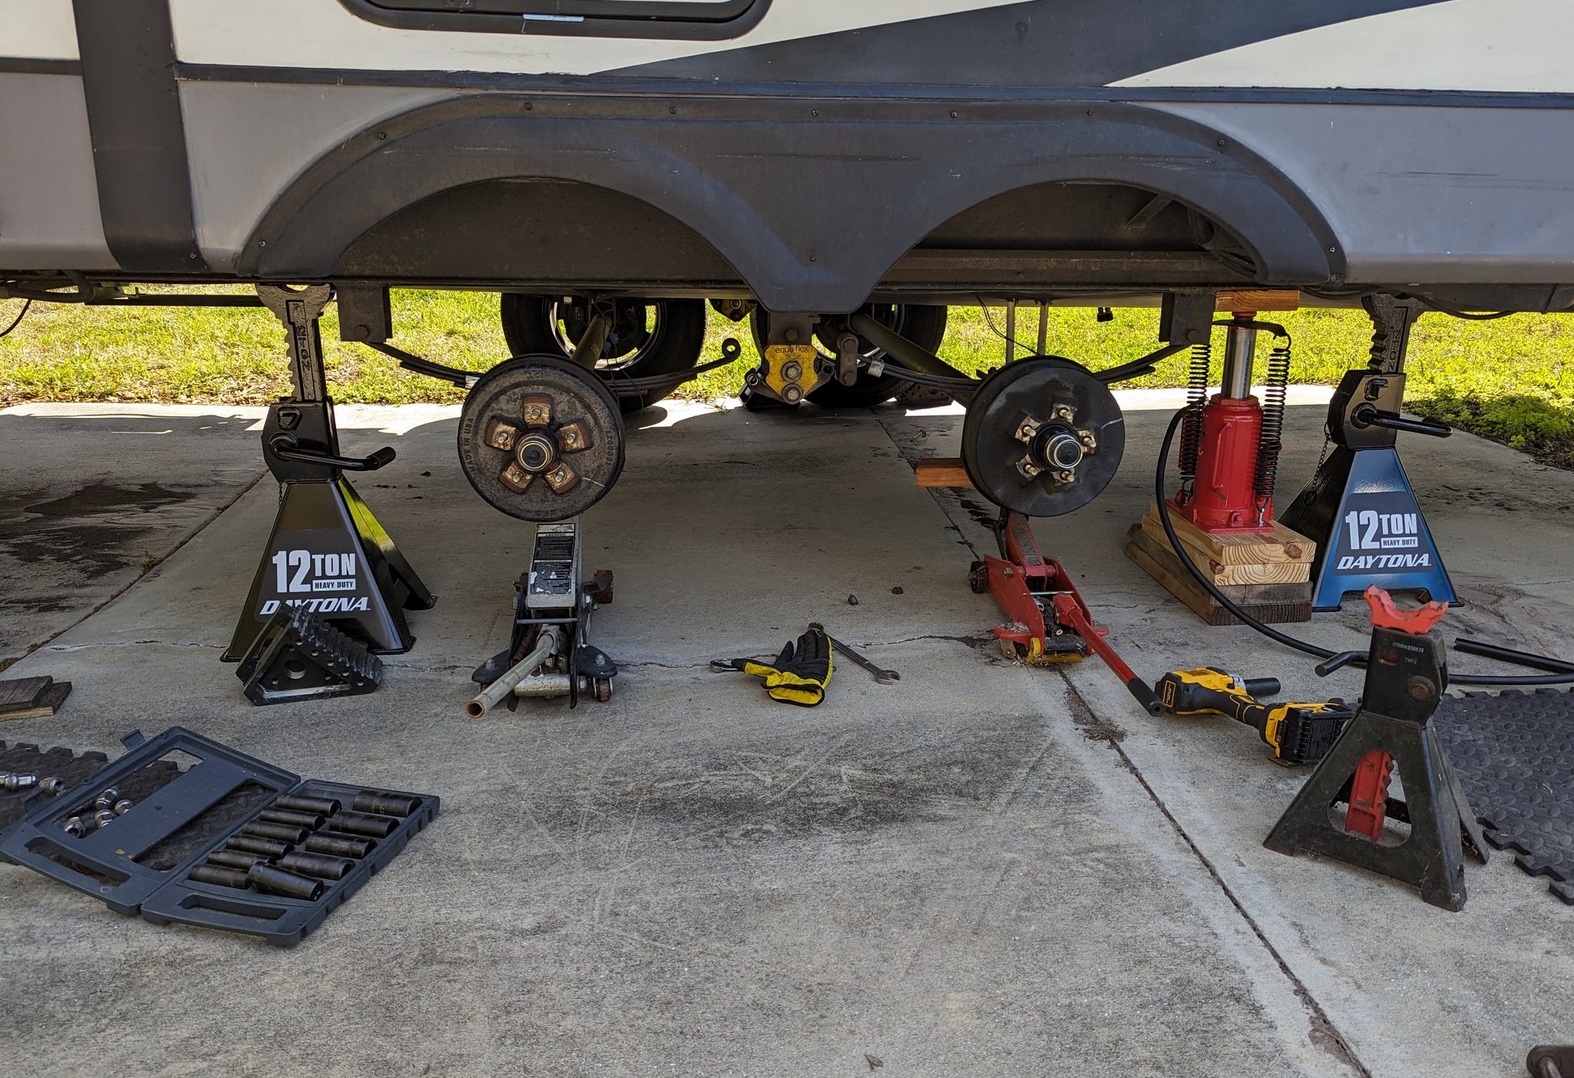
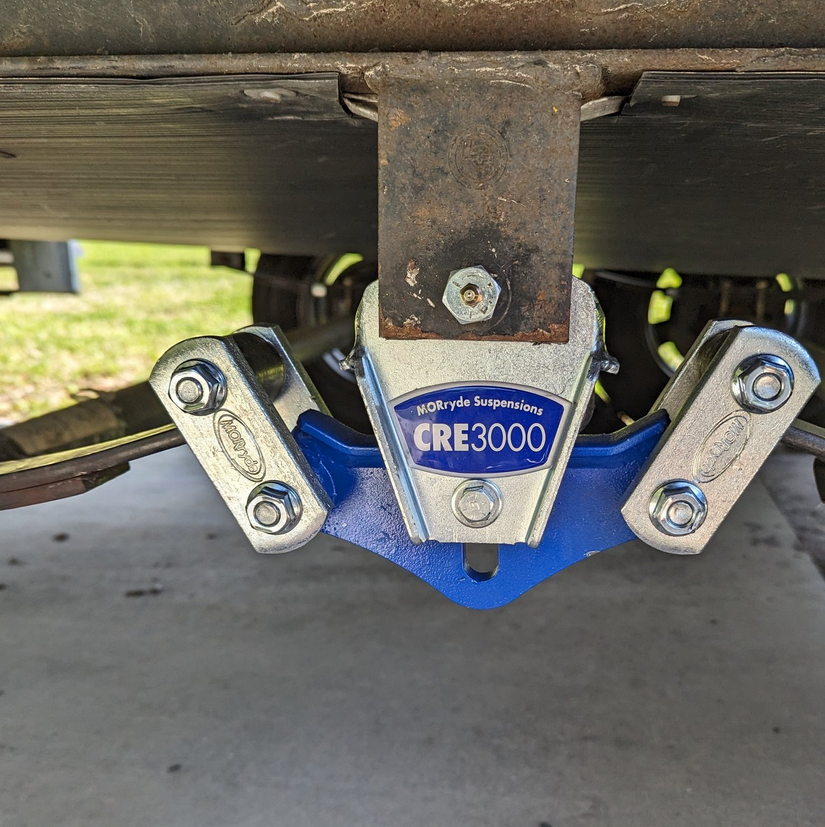
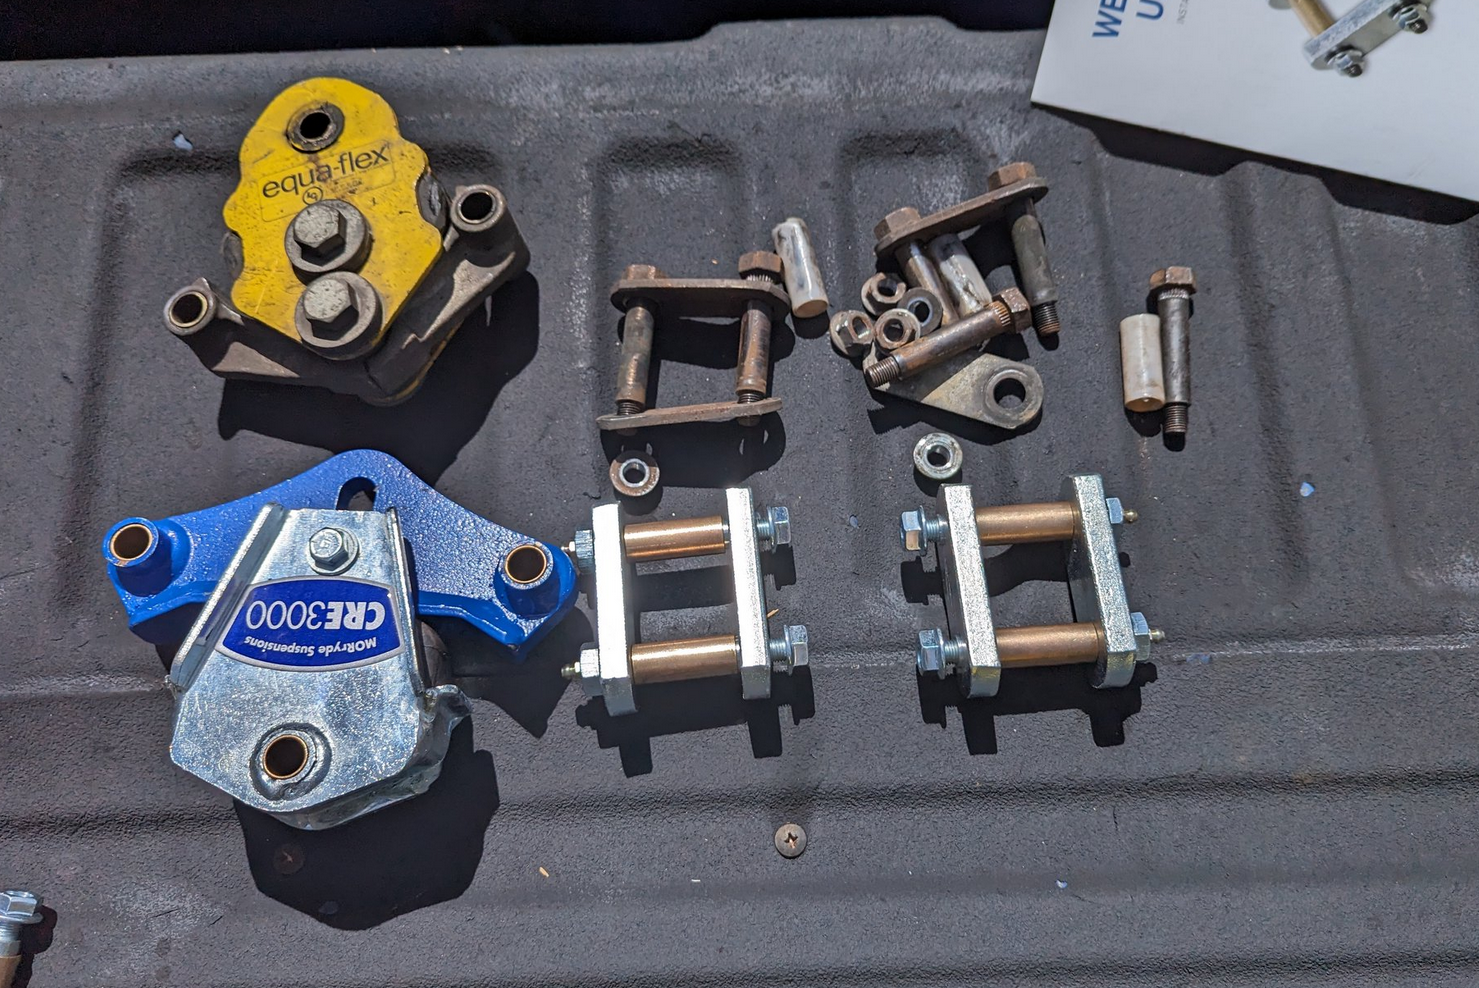
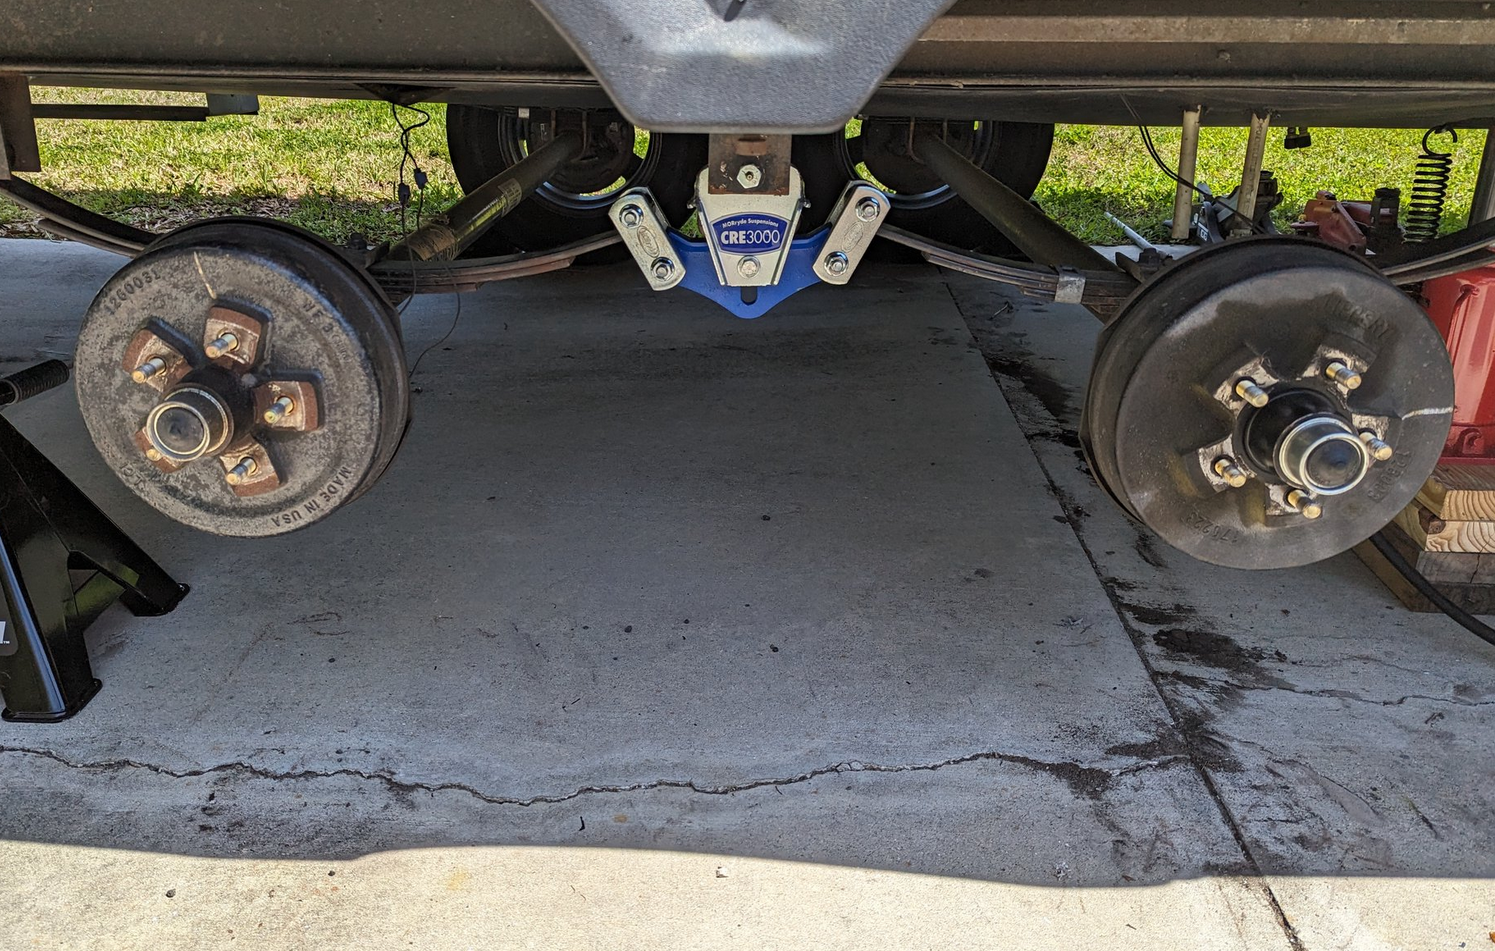
The stock suspension of our RV was definitely tired after 20k+ miles over the years so I decided it was finally time to replace it. I picked up a set of MORyde 3000 equalizers to replace the worn out stock system.
The installation was honestly pretty straight forward. The hardest part was getting the splined bolts to set in their respective places but after a good bit of percussive maintenance I got them where the should be.
I like that this set has brass bushings and wet bolts letting me grease the system to keep it running smooth.
Can't wait to try it out for our trip in April!
Air Conditioning Replacement
While on our trip in December I realized the AC was no longer blowing cold. I checked the few things you can check but ultimately decided it was either lacking refrigerant or the condenser itself had failed. Everything was kicking on but the amp draw of the condenser was close to 9 amps which is very low, it should be closer to 11. Given that and that there isn't really much serviceable on these units it was time to just replace it.
Thankfully replacing the AC on an RV is a relativity simple job with the only hard part being getting the new unit up on the roof.
After watching a few youtube videos and options I ultimately decided to go for the pure brute strength method of sliding the box up the ladder while I pushed it up from below. Our camper is backed up to a little bit of a hill which helped cut some of the distance down.
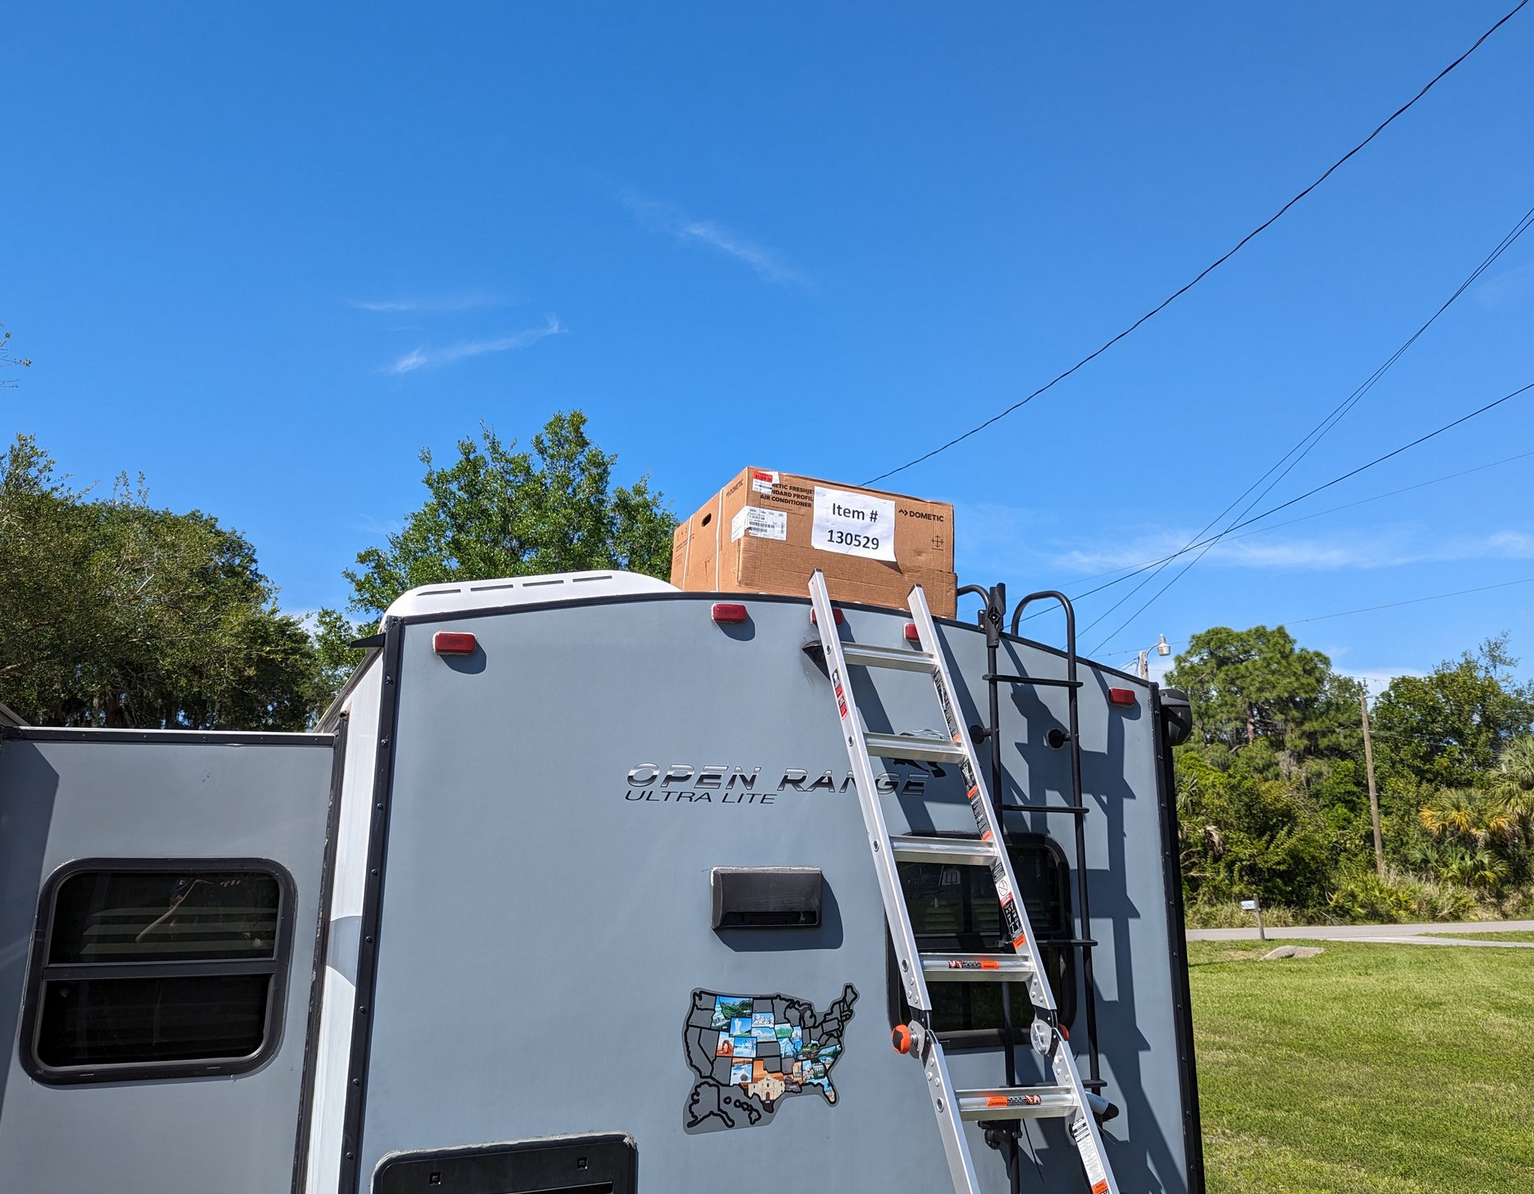
Heavy but it's up there!
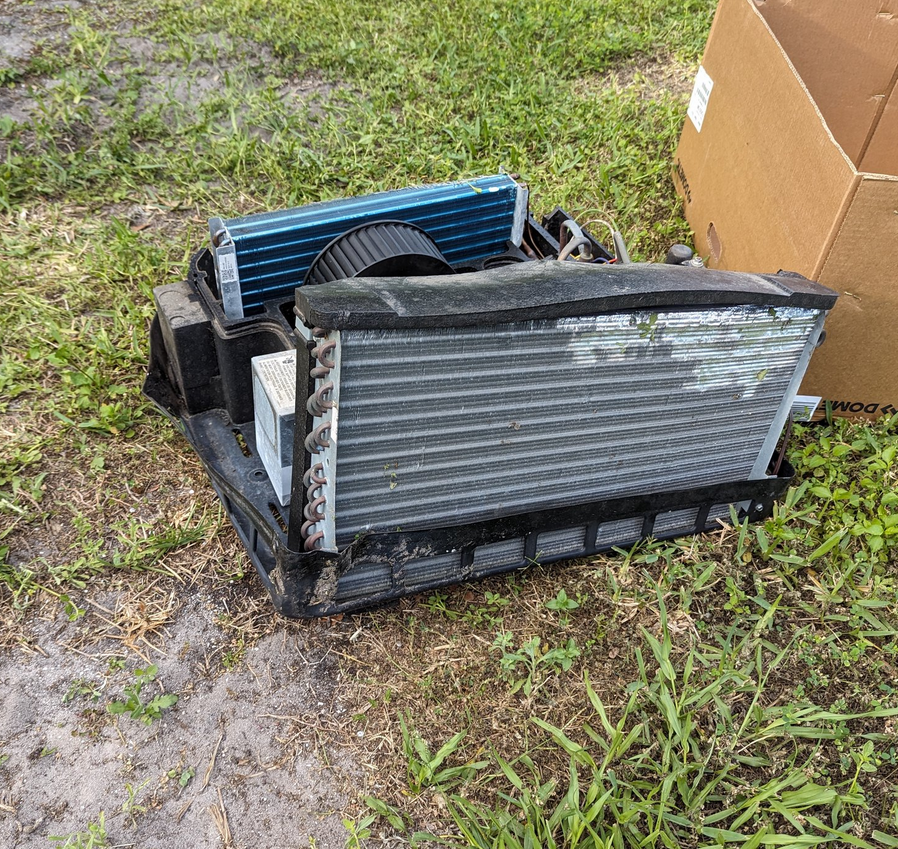
Thankfully getting the old one down was much easier with the help of gravity.
I didn't get a whole lot of photos of the actual install of the unit but it is really easy to do once you get it in place. This unit we got was even an upgraded unit from 13.5k BTU to 15k BTU.
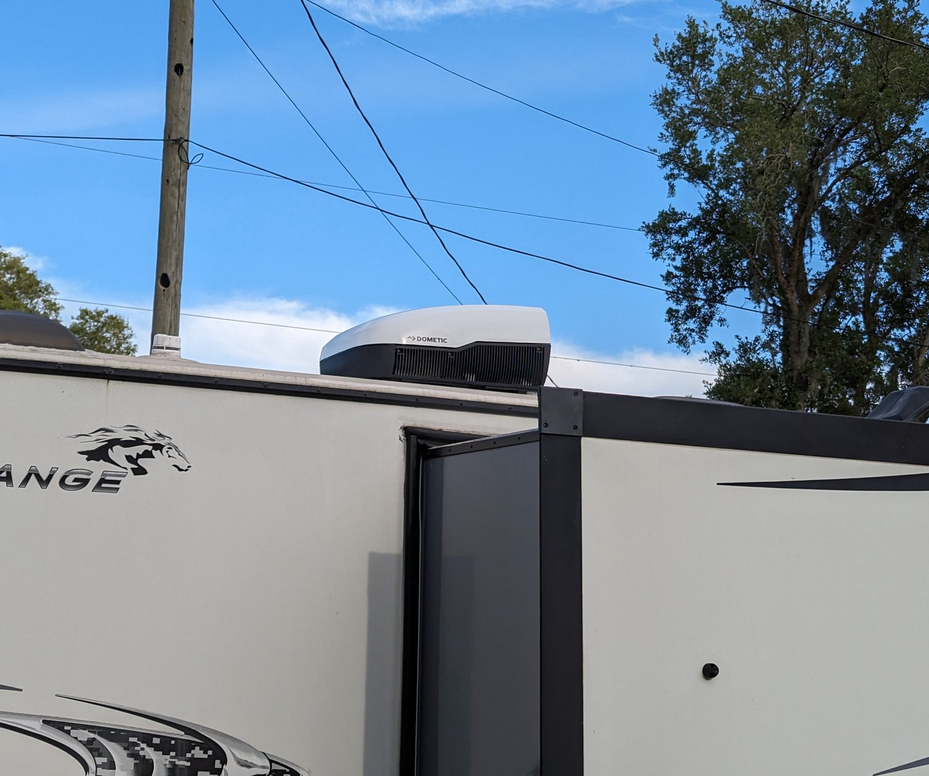
Ultimately if you can I would definitely recommend doing this job yourself.
December 2023
This was a busy month for repairs! We were planning a trip to Texas towards the middle of the month and had to get a lot done to recover from our West trip. Some of this stuff I should really have started on much earlier but in the end I got most of it done
Slide Floor Replacement
This one wasn't done by me I ended up paying some one to do it - but we replaced the floor in the slide. It must have been leaking for a while and I think it's probably been leaking since we bought it but was hidden by the floooring. Best I can tell is the slide was leaking somewhere along a seam and running down the inside of the our wall and settling on the floor and just wicking.
Since the flooring was run to the edge and is not breathable the water just sat and build up until both edges of the floor were shot. This was evident by the end of our West 2023 trip because it was as solid as silly putty and only the flooring and covering were keeping it together.
The end result took a bit, we payed out for a local company to do the replacement and it certainly wasn't cheap. We were worried it wouldn't be done by the time we needed to leave but they got it to us on Monday morning of the week we needed to leave.
Overall they did a good job, the flooring they put in was definitely an upgrade from the stuff that was there originally (They put in special water resistant marine plywood).
My best advice on this is just to make sure to stay on top of your sealants.
Re-sealing
No pictures for this one. Went around and re-caulked literally every single joint and screw I could find. At this point pretty sure my RV is mostly just Pro Flex RV Sealant. Found quite a few little spots that the original sealant had failed.
- Resealed all the drip gutters and their screws
- Resealed all the corner joints along the outer walls
- Resealed any any single thing I could think of around the hatches: the screws, the strike plates, the outer frame
- Resealed around every single window and will probably review again when I get home
- Resealed the trip plate that meets with the front end metal protective plate (not sure what to call that exactly)
- Tried and failed to re-seal the split between the gutter pieces and will probably resort to using flex seal to stop it from dripping there
- Coated the entire fucking slide in sealant
Total cost was a good few hours and two entire tubes of Pro Flex. I think there are a few more spots I'll tackle when I get home but checking seals bi-monthly will be added to the checklist.
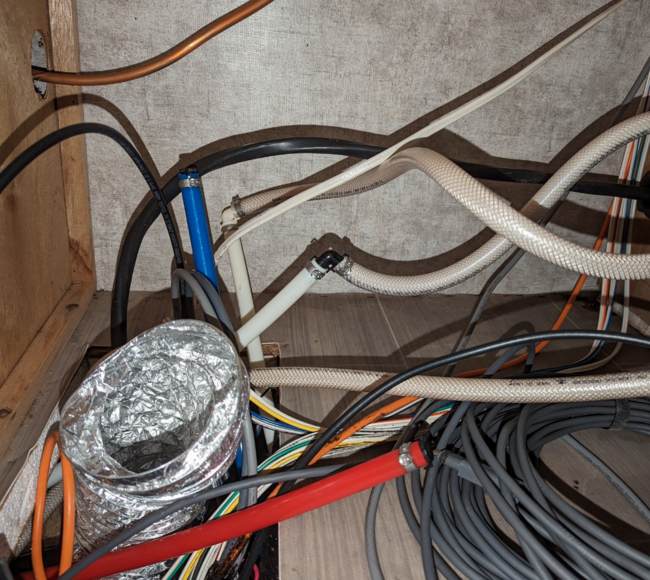
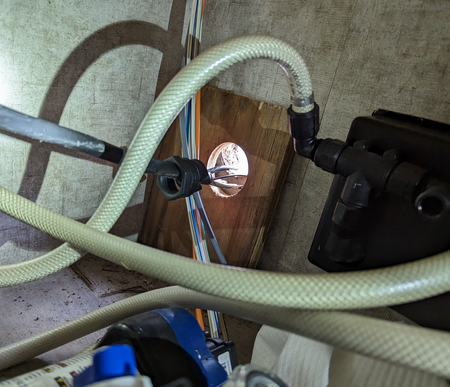
Plumbing Issue
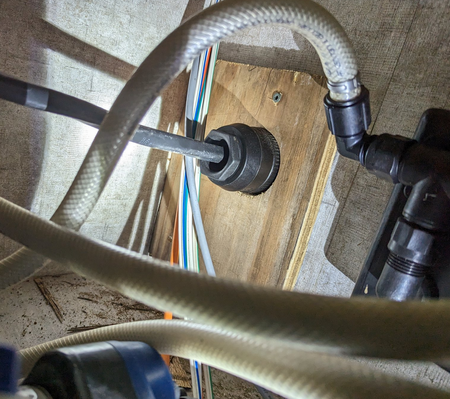
While vacuuming I found some water along the edge of the baseboards. After looking around for a bit I found a leak behind an access panel under the refrigerator. This is where the water comes in from the outside and is split via T connectors to various systems (back to the RV, the water pump and an outdoor faucet). I also discovered that the water pump had broken from it's mount and was just moving around. Probably the ultimate cause of the leaking fittings.
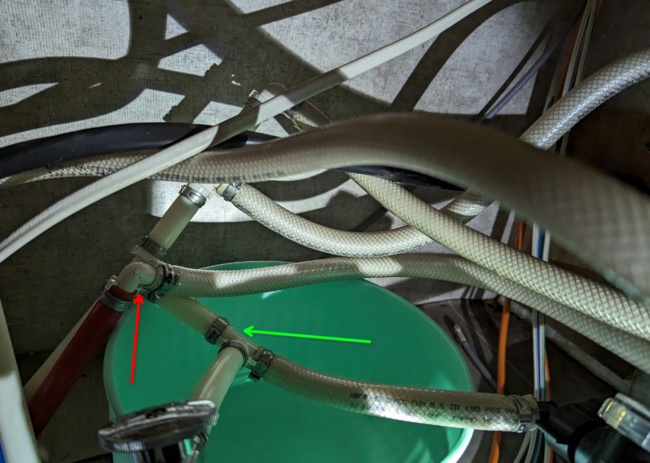
The red arrow is the hot line, it's the very end of the line that goes to an outdoor faucet that I never used. The green arrow points to where the water main splits off into the water pump. This line is specifically so the water pump to feed back into the system when using stored water instead of city. Here there is also a valve that you can turn to feed water back into the tank. All of this shit I had to figure out on the fly since there is not "pumping" diagram.
The temporary solution was to essentially rip out and remove all of the splits and just run the inlet directly into the main system. I also needed to cap off the end of the hot water line since I had no reason to hook the outdoor faucet that, again I have never used, back up.
The end result is a simpler setup for now until I get back home and am able to re-do the water pump in a much cleaner fashion.
Battery Replacement
While on the road in Belton, TX I woke up one morning to find the caps to my RV's lead-acid battery on the ground about 4 feet away from the battery. Upon further inspection I found that my entire battery had basically exploded apart. The plastic casing was cracked and popped up. Definitely not an ideal situation.
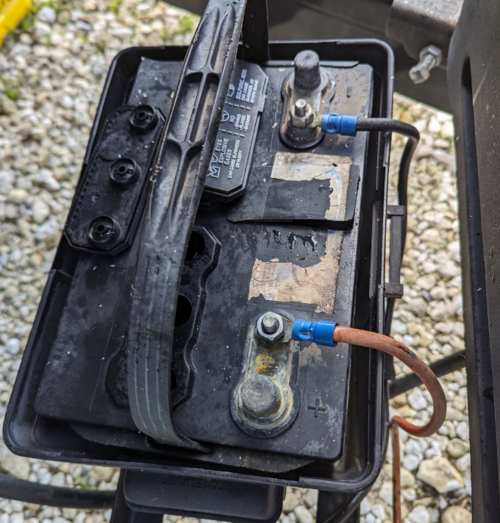
Thankfully managed to find another cheap deep cycle battery for about $100 locally to replace it with and we should be back in business for now.
When it rains it pours.
May 2023
This was the first week of our three month long trip around the US. I covered a lot apparently before hand but never really thought much about the sealant around the items on the roof.
Never stop learning with these things.
Leaks and Sealant
While we were in Foley, AL we got hit with a pretty hard rain storm and suddenly we were met with water coming in from around some windows and through our roof!
I hopped up on the roof after the storm settled and it was safe to do and found all the seals around the roof mounted accessories was worn and cracked. I also ended up finding a slide wiper seal that has been torn!
These are things I probably should have caught before we had left but with all the other things going on I completely missed checking it.
Granted the poor gal is almost 5 years old and has seen many many many miles, so it's not surprising to me we are starting to see some degradation in the old sealants.
With the bad news out of the way, the good news was that while we were in Belton we had family that let us stay at their place while the RV was getting over to the shop to get worked on.
We found an excellent shop called Heat of Texas RV Pros that took great care of us and fixed us up really good. They resealed everything, replaced the slide seal and even fixed a few other things they found while they were working on her.
Still there were a few other things that need addressed, but those things will have to wait until we get back to home base.
April 2023
A week or two before our big trip starts and I find that the RV power inlet had been leaking for probably quite a while.
Leakage and wood failure around RV plug
While doing some pre-flight checks I noticed the power inlet for our camper was pulling away from the wall. Given this needs to sit flush with the wall to avoid water from coming in I knew this needed to be addressed sooner rather than later.
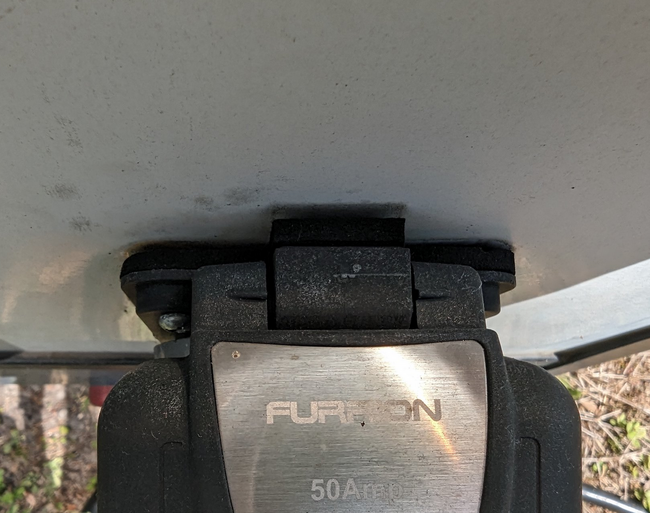
I removed the plug from the wall and found it had probably been leaking for some time unfortunately, as the "wood product" had rotten away a fair bit and the side of the wall had de-laminated a bit from it.
To start the repair I used two part epoxy all around the inlet wall and using a syringe injected as much as I could between the layers to re-seal them and create a protective barrier to prevent any future water intrusion into the area.
Then using a hole saw I cut out a 3" hole out of a piece of spare plywood and mated that on the opposite side of the outside wall to give something solid to screw the plug into given that a 50A power cord is pretty damn heavy in the first place.
I then proceeded to use some Pro Flex to give it the absolute worst caulking job I've ever done in my life. I think it was because it was a somewhat older tube of Pro Flex that I had used and sealed up from a past project so it was a bit stickier and less fluid than a fresh one but I didn't want to open a new one just for this so here we are.
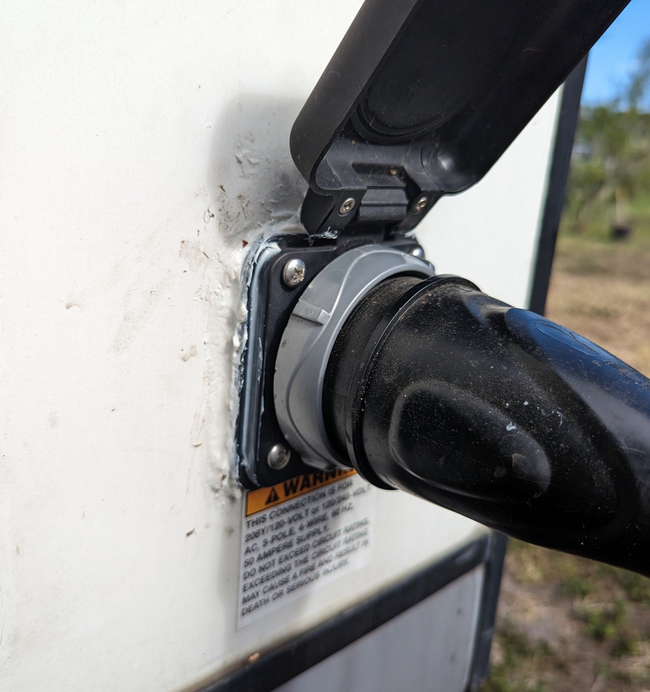
The plug feels much more solid in now!
I've also picked up a right angle adapter to attempt to take some of the pressure off from the 50A cord's weight which I'll use in the future when hooking up.
February 2023
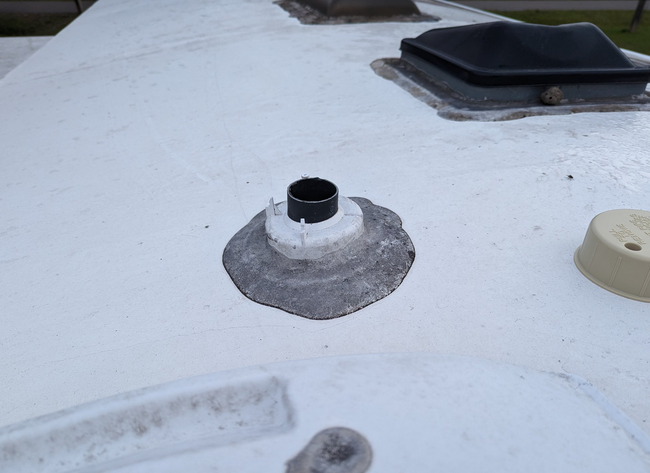
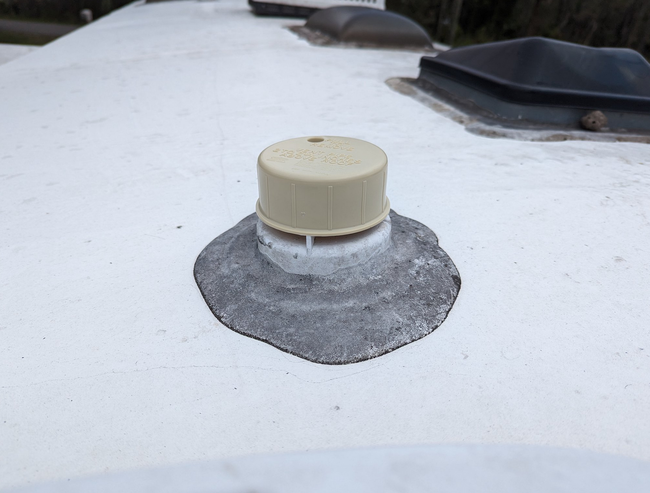
Vent Cover Replacement
After a really really long travel day (essentially from Atlanta to our home which is about 9 hours) while I was pulling into the drive way it was dark and rainy and honestly I was not really thinking and ended up pulling under a big oak tree on our property.
Ultimatly this is another victim of the same issue I fixed in January, I just didn't realize until recently the cover for the vent was missing.
I picked up another vent cover from Amazon for pretty cheap, under 9$ total. The only thing is that the vent was the full unit and I figured I probably only needed the top cover bit.
After getting the vent and being able compare it to the one of my roof I realized one of the little legs that hold it on was missing, guess I managed to break that one - the good news though was that there was a screw really responsible for holding it on so I was able to just swap out the top bit as well as the existing screw and was good to go without needing to remove and replace the existing dicor which I will probably still have to do at some point.
That said - repair successful and time to move on to the next one!
January 2023
Replacement Popup Vent Cover
Replaced a broken pop up vent cover after breaking it by driving under a tree that had a branch that was too low. Forgot to take a picture of this.
Electrical Issue
For a couple of trips I had been noticing that my Furrion observation camera would periodically "lose signal" and come back. I just figured it was the display itself losing the wireless connection with the camera briefly and never really worried about it too much.
On our last trip the camera went out for an extended period and we happened to be towing at night, so I glance back at the trailer and realized the running lights were off. This is the same power source the camera uses so now I'm wondering if it's actually been the issue for a while
After a bit we hit a bump in the road and everything came back on so I kept going to our destination so I could get the trailer dropped off and look around to see if I could identify anything. During my walk around I noticed that one of the side markers was not lit up so I went to remove the cover from it to check the bulb and the bulb just fell out!
When I looked further I realized that the wiring to the actual marker had been pulled out into the plastic wire tubing and had been just touching each other for who knows how long. This resulted in the wiring being completely melted at the connector. I snipped the bad part of the wiring off and taped everything up while we were on the road for the weekend for further review once we got home.
After getting home I proceeded to do a full check of all the wiring from the trailer plug to the lights and found a the connection between the plug and the trailer to have the running lights wiring melted, most likely because of the short from the bulb. I also found the connector to the camera had come slightly loose enough that it could disconnect slightly though the design of the connector (essentially a TRS) prevented any shorting issues.
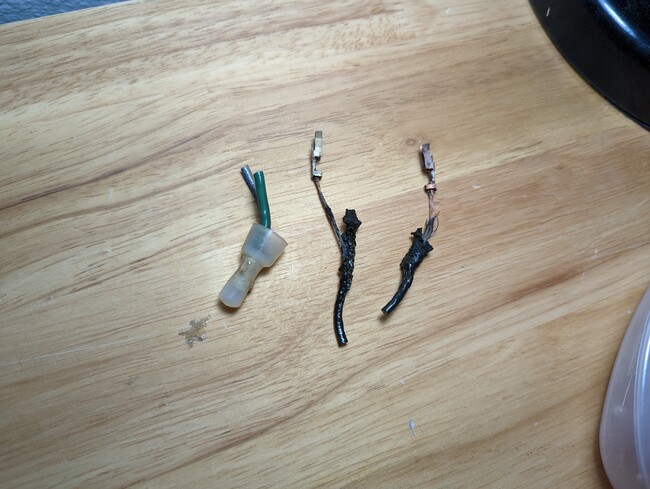
In the end I replaced the side marker, replaced the melted wire connection and fixed the loose connector to the camera so that hopefully that solves our issue!